Comprehensive Guide To Uneekor Eye XO
Are you a golf simulator enthusiast wishing to install the Uneekor Eye XO golf simulator and elevate your indoor golfing experience? You have arrived to the correct location! In this comprehensive guide, we’ll walk you through the Uneekor Eye XO installation procedure step by step, ensuring that your home golf simulator runs smoothly and without issue.

Download Instructions User Manual: Uneekor
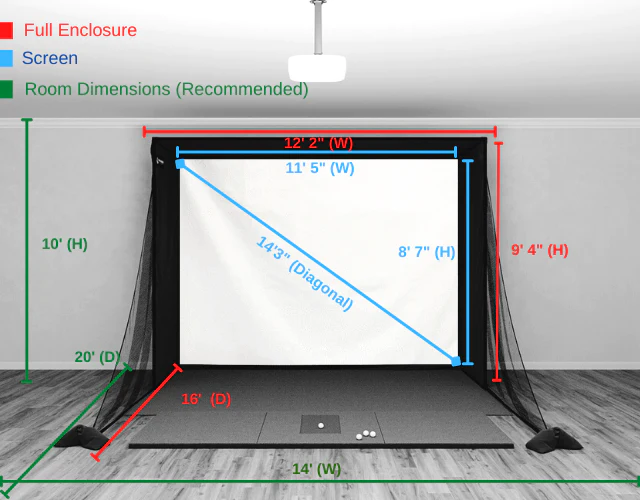
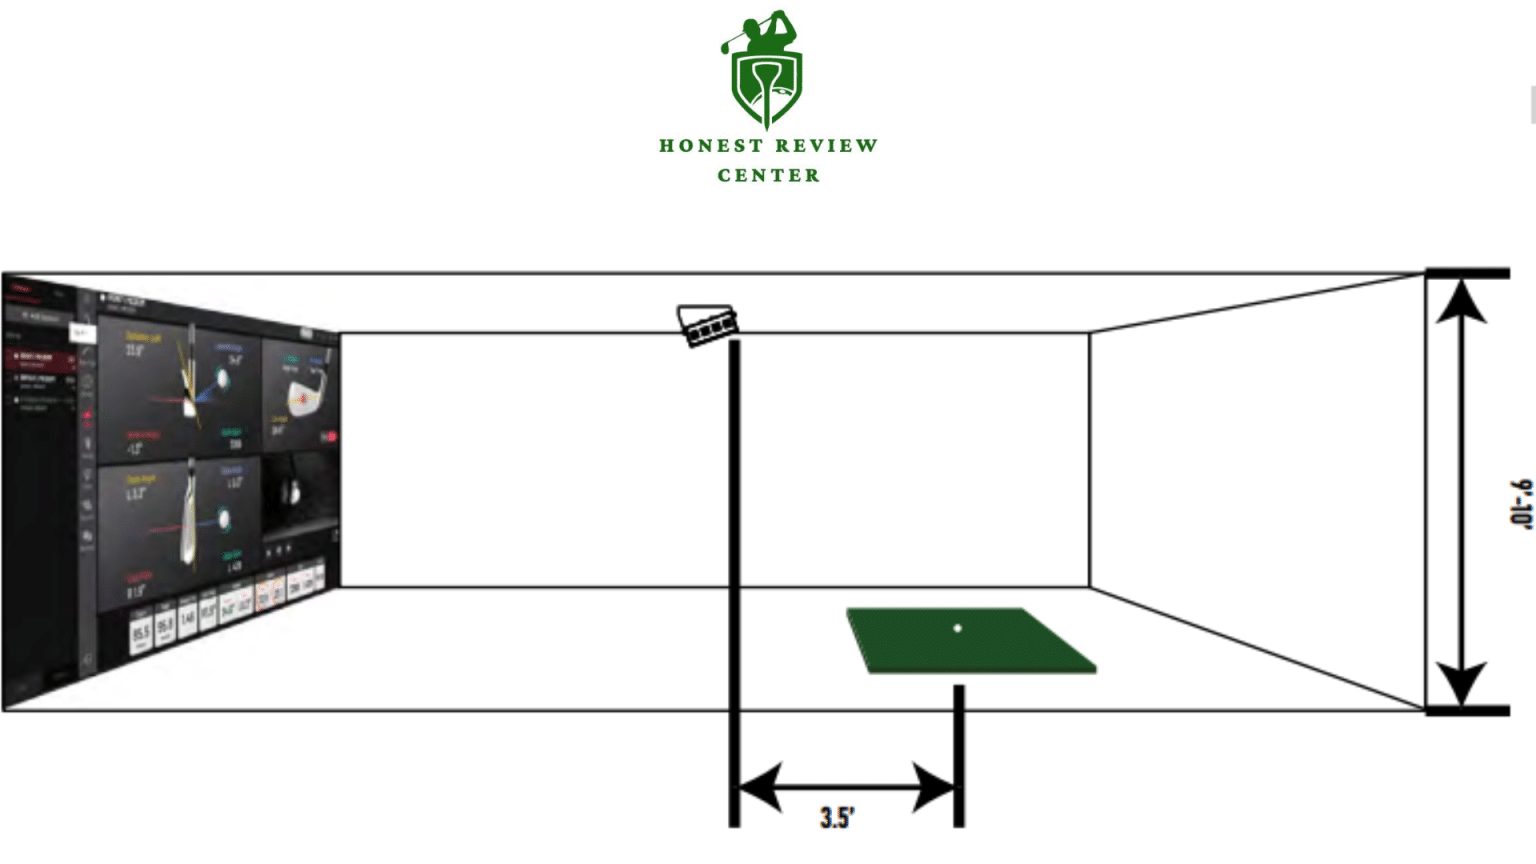
Uneekor EYE XO Dimensions Required:
|
Room Height |
10 Feet |
|
Room Width |
14 Feet |
|
Ceiling Height |
13 Feet |
|
Room Depth |
20 Feet |

Computing Requirements:
- CPU = i5 8th Generation or Higher, Ryzen 3rd Gen or Higher, AMD 3600 or Higher
- RAM = 8GB
- OS: Windows 10 (64 bit)
- Graphic Card: Minimum GeForce GTX 1060
- Ethernet Connection
- Resolution of System: Full HD
How To Setup Uneekor EYE XO Device?
Step 1: Unboxing The Uneekor Eye XO
Before we begin the installation procedure, let’s unbox your Uneekor Eye XO. Check that you have all of the components, including the camera unit, projector, wires, and any other accessories that may be included with your package. The user handbook contains a full list of things.
Step 2: Selecting The Right Location
Choosing the best location for your Uneekor Eye XO is critical for precise shot tracking and a fully realistic golf experience. Consider room size, lighting conditions, and the distance between the camera unit and the target region. Refer to Uneekor’s standards for recommended specs.
Step 3: Mounting The Camera Unit

Once you’ve found the ideal location, it’s time to mount the camera device. Use the supplied brackets and follow the step-by-step directions in the installation manual. Ensure that the camera is properly attached and oriented in accordance with the recommended specifications.
Step 4: Connecting Cables
Carefully attach the wires included with your Uneekor Eye XO to ensure a secure and snug fit. Pay attention to cable management to eliminate tripping hazards and keep your setup nice. Connect the camera unit to your computer or chosen device according to the instructions.
Step 5: Installation of Software and Drivers
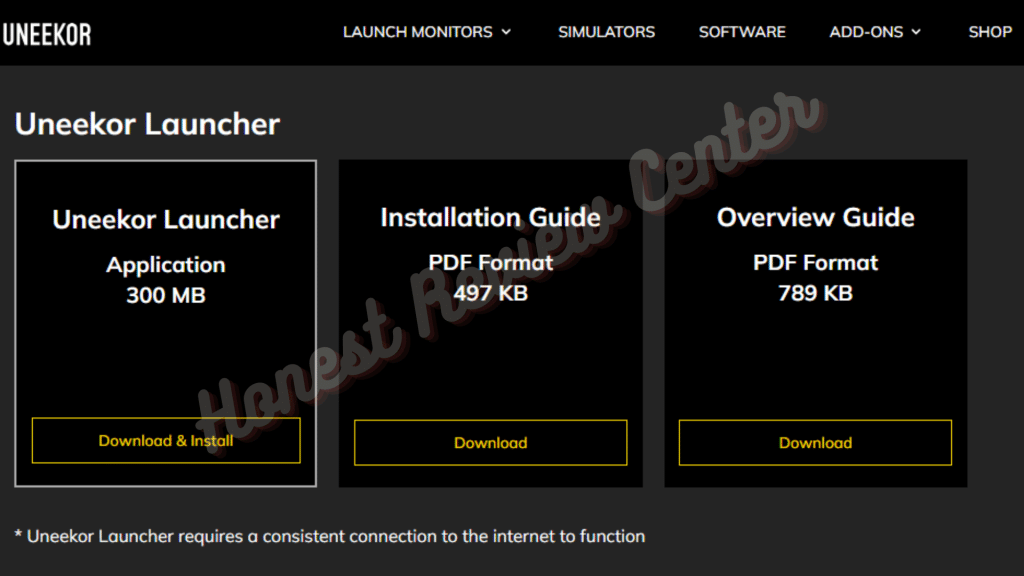
Visit the Uneekor website to get the most recent software and drivers for your Eye XO. Follow the installation procedure, entering the essential information as requested. Ensure that your system satisfies the minimum requirements for optimal performance.
Step 6: Calibration Process
Calibrating your Uneekor Eye XO is vital for accurate shot tracking. Follow the on-screen directions to calibrate the system using the size of your striking area. Take your time with this stage to guarantee precise measurements of club speed, ball speed, and other important data.
Step 7: Test and Troubleshooting
Before playing a round of virtual golf, run a test to ensure that the Uneekor Eye XO is accurately monitoring your shots. If you have any problems, refer to the troubleshooting section of the user manual or contact Uneekor’s customer service for help.
Golf Simulator Dimensions Guide
How To Install Uneekor EYE XO Software?
The Uneekor Eye XO software installation process entails downloading the necessary software, installing it on your computer, and adjusting the parameters for best operation. Here’s a step-by-step procedure:
1) Go to the Uneekor Website: To reach the software download section, go to the official Uneekor website. This is usually found in the help or downloads section.
2) Find the Eye XO Software: Look for the Eye XO software download that corresponds to your operating system (Windows or macOS). Download the most recent version of the software.
3) Get the Software: Click on the Eye XO software download link. The file could be an installer (e.g.,.exe for Windows or. Mg for macOS).

4) Execute the Installer: When the download is finished, double-click the downloaded file to launch the installation. To begin the installation procedure, follow the on-screen directions.
5) Accept licensing Agreement: You may be required to accept the licensing agreement during the installation. Read the terms and conditions carefully, and then proceed with the installation if you agree.
6) Select an Installation Location: The installer may prompt you to select an installation location on your computer. Choose an acceptable directory or use the installer’s default location.
7) Allow the Installer to Finish: Allow the installer to finish the installation process. Depending on your computer’s processing speed, this could take a few minutes.
8) Start the Software: When the installation is finished, run the Eye XO software. A shortcut may be found on your desktop, in the Start menu (for Windows), or in the Applications folder (for macOS).
9) Connect the Camera device: To connect the Eye XO camera device to your computer, follow any on-screen prompts. Check that the camera is correctly connected and that the program recognizes it.
10) Configure Settings: Use the software interface to customize settings to your liking. You may need to enter information about the dimensions of your hitting area, choose the sort of ball you’ll be using, and alter other characteristics.
11) System Testing: Perform some test shots before beginning a full session to confirm the system is recording your shots correctly. Adjust parameters as needed for best results.
12) If Assistance is Required: If you have any problems during the installation or calibration procedure, review the user manual or contact Uneekor’s customer service.
You should have successfully installed the Uneekor Eye XO program and setup your golf simulator for an immersive experience if you followed these steps.
Final Words:
Congratulations! You’ve successfully installed your Uneekor Eye XO, and you’re now ready to enjoy the thrill of indoor golf. This installation guide has provided you with a full walkthrough of the procedure, ensuring that your home golf simulator is set up for optimal performance.
If you have any additional queries or issues, please refer to the user manual or contact Uneekor’s customer service for expert assistance. Enjoy your virtual golfing experience!
FAQ’s:
The Uneekor EYE XO installation normally consists of several crucial steps. Begin by assembling the hardware components, such as the launch monitor and any other attachments. Connect all essential wires and power sources. Install the software on the selected machine to ensure compatibility. Finally, calibrate the system to ensure optimal functioning.
To assemble components, the Uneekor EYE XO installation often requires basic equipment such as a screwdriver and, in certain cases, an adjustable wrench. It’s best to check the installation guide for any unique tool needs.
Uneekor designed its products with easy installation in mind. While many customers may successfully install the EYE XO on their own, some may prefer expert assistance for a more flawless setup. The installation guide gives detailed instructions for both circumstances.
The Uneekor EYE XO Golf Simulator normally requires precise computer system characteristics, such as the operating system, processor, RAM, and graphics card. To ensure optimal performance, make sure your machine meets or exceeds these criteria.
Calibration is an important stage in the Uneekor EYE XO installation process. The installation guide includes extensive directions for calibrating the device, such as aligning the launch monitor, adjusting the hitting area, and customizing software parameters for precise data collecting.
Proper lighting is required for accurate data gathering. The installation guide usually makes advice for lighting conditions, such as avoiding direct sunlight and ensuring steady illumination. Adjustable lighting solutions may be recommended during different times of day.
The Uneekor EYE XO is normally compatible with a wide range of projectors and screens. The installation guide details the required specs for maximum visual performance. Users may utilize their existing equipment as long as it fits these specifications.
The space required for the Uneekor EYE XO installation varies. Typically, the installation guide provides the recommended striking area dimensions as well as any other space requirements. Users with restricted space should carefully consider these criteria.
The installation guide provides thorough directions for attaching the Uneekor EYE XO launch monitor to your PC. This usually entails using the given cables and making secure connections. The tutorial may also include troubleshooting techniques for connectivity concerns.
The Uneekor Eye XO golf simulator system connects to a PC via USB and HDMI cords. Here’s a general guide for connecting the Eye XO to a PC:
1. Camera Unit Connectivity:
The Eye XO system comprises a camera unit for capturing and analyzing golf shots. Connect the camera unit to your computer via a USB wire. The USB cable will most likely contain a conventional USB connector on one end (for connecting to your PC) and an Eye XO camera unit-specific connector on the other.
2) Power Connection: Connect the Eye XO camera unit to a power source. This is normally accomplished using the system’s included power adapter.
3) HDMI Connection: Connect the Eye XO system to your PC or display using an HDMI cable. The HDMI cable sends the video signal from the Eye XO to your monitor. The HDMI cable should include HDMI connectors on both ends, one for the Eye XO system and one for your computer or display.
4) Additional Cables: Depending on your arrangement, you may want extra cords to connect the Eye XO system. If your PC is not close to the hitting area, you may need to use a USB hub or extension cables to reach it.
5) Software installation: After connecting the hardware, install the Uneekor Eye XO program on your computer. This software is required for operating the golf simulator, analyzing shots, and changing preferences. You may get the software from the Uneekor website.
6) Calibration: Use the Eye XO software’s on-screen instructions to calibrate the system. Calibration is a necessary step for accurate shot tracking and measurement.
7) Configuration: Adjust the software parameters to your tastes. This could entail entering information about your hitting area measurements, selecting the sort of ball you’re using, and tweaking other settings.
8) Testing: Take test shots to check that the Eye XO system appropriately tracks your shots. This phase enables you to test the system’s performance before beginning a full golf session.
Remember that these instructions are only a basic overview; the specifics will vary based on the Eye XO model and any system updates. Always refer to Uneekor’s user manual and documentation for complete and accurate instructions specific to your setup. If you have any problems, Uneekor’s customer service can help.
Uneekor periodically releases software upgrades to improve performance and provide new features. The installation guide may include instructions on how to check for updates, download the most recent software version, and apply updates to keep the system current.
Uneekor normally provides customer assistance to help users with installation-related questions or issues. The installation guide may include contact information for customer support, ensuring that consumers may get help when they need it.
The installation instructions may contain information about integrating third-party accessories. While Uneekor’s systems are normally designed to function effortlessly, consumers interested in extra accessories can see the compatibility guide.
The Uneekor EYE XO Golf Simulator is primarily intended for indoor use. Due to lighting and environmental constraints, the installation instructions may expressly state that it is intended for indoor use. Installing the system outside may impact accuracy and performance.
Most installation guides contain a troubleshooting section that addresses common issues that users may experience. This can include connectivity issues, software problems, and calibration concerns. Users are supplied with detailed procedures and solutions to help them properly resolve challenges.
The installation instructions will most likely include safety guidelines to ensure a secure and risk-free setup. This may include securing wires to reduce tripping risks, assuring component stability, and adhering to standard practices for electrical connections.

